
If your first question is whether Filipino martial arts means learning to fight with sticks, the short answer is yes - but that is only the beginning. A solid filipino martial arts beginner guide should help you understand what you are actually training, why the system starts where it does, and how to build skills that hold up under pressure.
Filipino Martial Arts, often grouped under names like Kali, Eskrima, and Arnis, are practical systems built around timing, distance, body mechanics, and adaptability. Beginners are often surprised by how quickly weapon work connects to empty-hand defense. That crossover is one of the strongest reasons people train FMA in the first place. You are not learning random techniques. You are building a functional framework for self-defense.
What Filipino martial arts teaches first
A beginner usually expects a list of moves. What matters more is learning how the system organizes movement. In Filipino martial arts, your first lessons often focus on angles of attack, basic footwork, striking patterns, defensive responses, and range awareness.
That structure matters because FMA is principle-based. Instead of memorizing isolated combinations, you learn recurring patterns that apply whether you are holding a stick, dealing with a knife threat, or using empty hands. For a serious student, this makes training efficient. For a beginner, it makes progress measurable.
Most programs start with single-stick work because it teaches coordination, line recognition, and power generation without overwhelming the student. From there, training may branch into double stick, knife, empty hand, trapping, counter-for-counter drills, and transition work between ranges. The exact order depends on the school, but the goal stays the same: build usable skill, not just familiarity.
Filipino martial arts beginner guide to core skills
When people start strong, it is usually because they focus on a few fundamentals instead of chasing advanced material too early. The first is footwork. If your feet are slow, your strikes, defenses, and counters will all break down. Good FMA footwork teaches you to enter, angle off, evade, and recover balance while staying in position to respond.
The second is angle recognition. Filipino martial arts is known for organizing attacks by angle rather than by naming every possible strike. That helps beginners read motion faster. Instead of seeing ten different attacks as ten separate problems, you begin to see common lines that can be intercepted or countered with the same core mechanics.
The third is timing and distance. This is where training becomes real. You can know a drill and still fail if you stand at the wrong range or react at the wrong moment. A good instructor will push you to understand when you are safe, when you are exposed, and when to move.
The fourth is weapon-to-empty-hand translation. This is one of the defining strengths of FMA. The mechanics used with sticks often carry into elbow strikes, forearm destructions, hand fighting, and close-range striking. Beginners do not need to master every variation early on, but they should understand that the system is connected.
Why beginners often start with sticks
Starting with sticks is practical, not theatrical. A training stick gives clear feedback on alignment, range, and impact path. It also lets students develop coordination and defensive habits without immediately relying on raw strength.
There is another benefit. Weapon training tends to expose mistakes quickly. If your hand drops, your posture breaks, or your footwork stalls, the problem is obvious. That kind of feedback can sharpen awareness faster than empty-hand training alone.
This does not mean stick work is enough by itself. If a school teaches patterns with no pressure, no distance management, and no empty-hand connection, your progress will be limited. The better path is integrated training that shows how the same principles apply across weapons and unarmed situations.
What drills should a beginner expect?
A good filipino martial arts beginner guide should prepare you for drills, because drills are central to FMA learning. You may encounter angle striking patterns, partner response drills, hubud, sumbrada, and entry-counter flow work. At first, these can look fast and complex. In a well-run program, they are taught in layers.
Hubud develops sensitivity, rhythm, checking hands, and close-range coordination. Sumbrada helps train timing, countering, and tactical flow between partners. Basic striking drills reinforce lines, grip, chambering, recovery, and body mechanics. None of these should be treated as performance pieces. Their value comes from what they build: reaction, structure, composure, and tactical awareness.
The trade-off is that drills can become too cooperative if they are never progressed. Beginners should ask whether training eventually includes variable feeds, broken rhythm, defensive unpredictability, and controlled pressure. Technique matters, but timing against resistance matters more.
How to choose the right training approach
Not every beginner needs the same starting point. If your main goal is self-defense, you want a program that emphasizes practical application, scenario awareness, and progression from compliant drilling to pressure-tested response. If your goal is technical breadth, you may enjoy a wider curriculum with stick, knife, empty hand, and multi-weapon material from the start.
Online training can work well for beginners if the instruction is structured. Clear modules, repeatable drills, and coaching support can help you build good habits, especially if your schedule makes in-person classes difficult. The limitation is obvious: without feedback, it is easier to groove mistakes. The best setup is a blended approach where digital lessons give you structure and live coaching corrects details.
This is where a program-led model helps. Organizations like Kali Sikaran International have an advantage when they give students a clear path, specific goals, and technical categories that build on each other. Beginners improve faster when they know what to practice this week, what standard they are aiming for, and what comes next.
Gear, safety, and training expectations
You do not need a room full of equipment to start. A pair of training sticks, enough space to move safely, and a serious attitude are usually enough for early practice. As you progress, you may add training knives, focus mitts, protective gear, and equipment for partner drills.
Safety should be part of the curriculum from day one. That means controlled speed, proper distance, protective equipment when needed, and clear communication with training partners. Filipino martial arts is practical by nature, but practical does not mean careless. Good schools develop control alongside intensity.
Beginners should also expect repetition. Real skill is built by hitting the same mechanics until they become reliable. That can feel slow if you are chasing variety, but it is how confidence is earned. The student who trains footwork, striking lines, and defensive responses consistently will outperform the student who collects techniques.
Common beginner mistakes in Filipino martial arts
The most common mistake is trying to go fast before your mechanics are stable. Speed without structure creates sloppy movement and false confidence. Slow, accurate repetition is what gives you usable speed later.
Another mistake is treating drills as the end goal. Drills are tools. They build attributes and sharpen reactions, but they need context. Ask how a drill connects to timing, range, interception, or survival under pressure.
A third mistake is ignoring the non-weapon side of the system. Many beginners get excited about stick work and avoid close-range hand fighting, checking, clinch awareness, or empty-hand follow-up. That leaves a gap. Real training should connect all ranges.
Finally, some beginners underestimate mindset. FMA is not just about coordination. It requires focus, restraint, and the willingness to train with intent. Progress comes from disciplined practice, not casual exposure.
What progress should look like in your first months
In the first few months, progress should feel clear even if it is not flashy. You should move better, understand basic striking angles, keep a more stable stance under movement, and respond with less hesitation. Your awareness of distance should improve. Your hands should become more coordinated. Most of all, your training should start to feel organized rather than overwhelming.
If everything still feels random after weeks of instruction, that is a warning sign. Good beginner training creates structure. You should know what skills you are developing and why they matter.
The right start in Filipino martial arts is not about looking advanced. It is about building a base that holds up when speed increases, pressure rises, and decisions have to happen fast. Train with patience, choose instruction that values function over show, and let your confidence come from repetition you can trust.
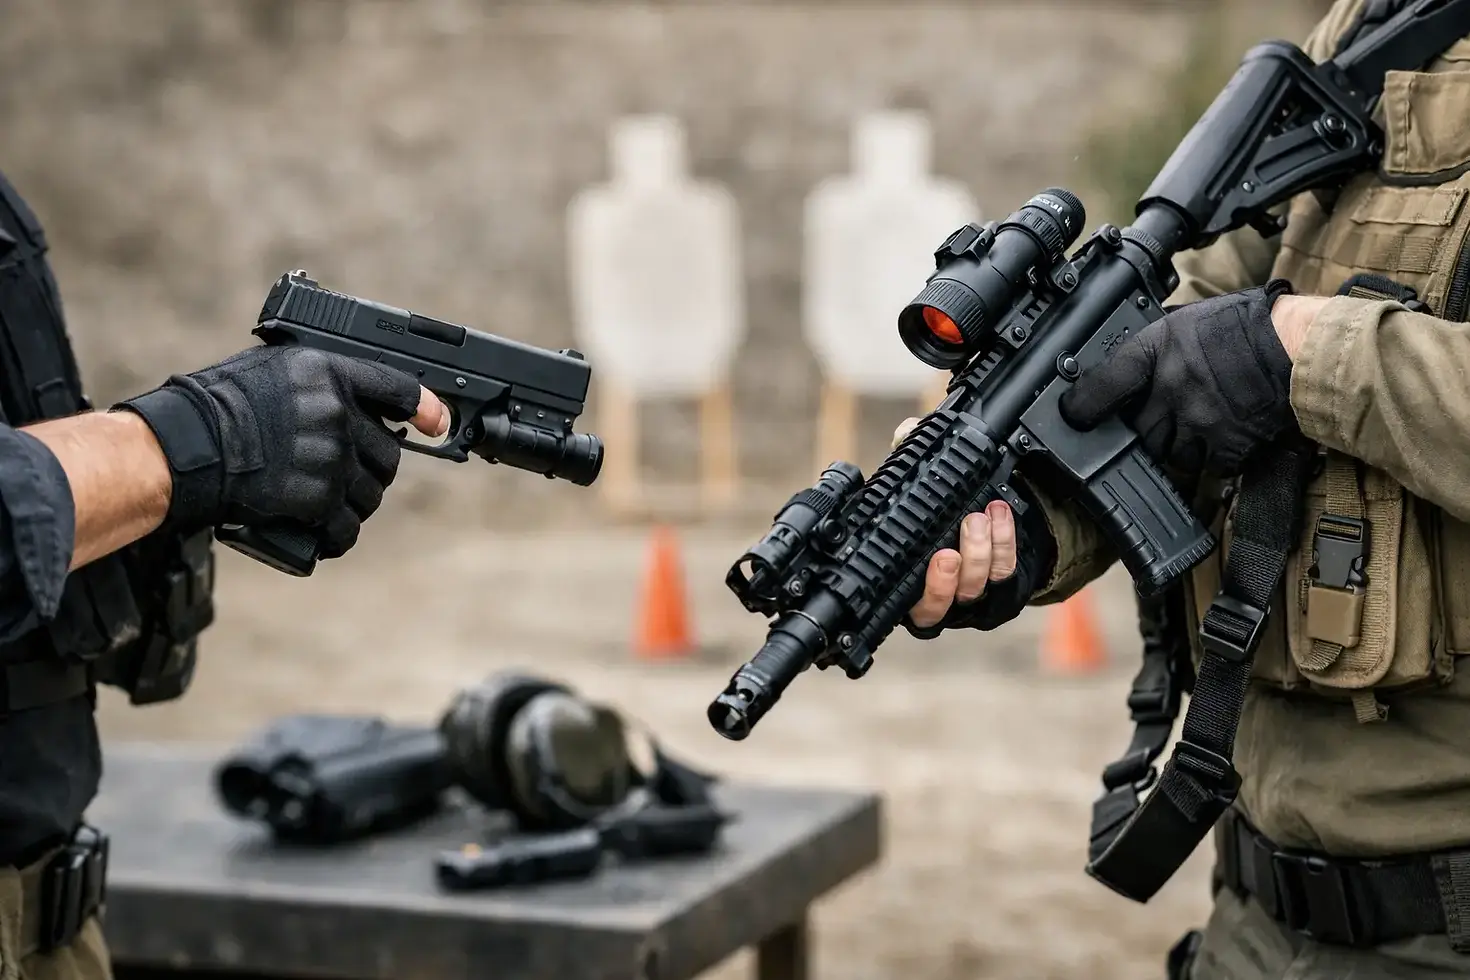
A fast handoff from stick to knife or weapon to empty hand looks sharp when it is done well. It also creates one of the easiest moments in training to lose control. If you want to train weapon transitions safely, you need more than speed. You need structure, timing, range awareness, and rules that hold up under pressure.
In Filipino Martial Arts, transitions matter because fights do not stay in one category. A weapon can be lost, trapped, broken, or inaccessible. One hand may be occupied. Distance can collapse. The student who only knows isolated weapon work often freezes when the range changes. The student who understands transitions can keep working with purpose.
That does not mean rushing into complex multi-weapon drills on day one. Safe training starts with a progression. You build clean mechanics first, then pressure-test them with control. That approach develops real capability without turning the training floor into a hazard.
Why weapon transitions create risk
Most training injuries during transitions do not come from advanced intent. They come from simple breakdowns. A student reaches across the body without clearing space. A partner steps in early. The new weapon is drawn before the old one is fully controlled. Eyes drop to the hand instead of staying on the opponent.
Transitions increase cognitive load. You are changing grip, tool, and tactical response while managing distance and timing. Under stress, people default to what is familiar. If the transition has not been trained methodically, the body tends to rush. That is where sloppiness appears.
There is also a false confidence problem. Many people can perform a weapon switch in the air. That does not mean they can do it safely against movement, contact, and resistance. Good training closes the gap between demonstration and application.
How to train weapon transitions safely from the start
The safest way to begin is to remove speed from the equation. Slow work exposes the details that fast work hides. Before any live partner drill, the student should be able to perform the transition cleanly in solo practice, with the correct body position, line of movement, and recovery posture.
Start with one defined transition at a time. That might be stick to empty hand, knife to empty hand, or stick to knife depending on the curriculum and training tools available. Keep the task narrow. One trigger, one response, one finishing position. When students try to learn too many options at once, they usually end up memorizing chaos instead of building skill.
Training tools matter. Use dedicated trainers appropriate to the level of the drill. Padded sticks, training knives, and clearly differentiated tools help students recognize what they are handling and reduce unnecessary risk. Live blades and improvised training shortcuts have no place in partner transition drills.
Just as important, define the end point of each movement. A transition is not complete when the new weapon appears. It is complete when the student has regained structure, addressed the line of attack, and can continue with control. That mindset prevents flashy but tactically weak movement.
Build around position before speed
A strong transition begins with body alignment. If your feet are crossed, posture is broken, or your live hand is hanging, the weapon exchange is already compromised. Students should learn to move the body first so the hand change happens inside a stable base.
That often means using simple positional checkpoints. Is the head protected? Is the non-weapon hand active? Is the draw path clear? Is the original weapon retained, dropped by plan, or transferred with purpose? These are not minor details. They are the difference between functional training and reckless movement.
Make the partner's role clear
A lot of bad transition training comes from vague partner behavior. One person is trying to practice a clean sequence while the other feeds inconsistent energy. That creates confusion, and confusion creates unsafe reactions.
Give the feeder a precise job. Feed a known angle. Hold a known range. Apply known pressure. Then build from there. Once both people understand the task, you can gradually increase realism without losing discipline.
Progression beats intensity
If you want students to become competent, give them levels. Safe training is not soft training. It is organized training.
The first phase is isolated mechanics. This is solo work or very light cooperative partner work where the student learns where the weapon is, how the hand moves, and what the body should do. There is no need for speed here.
The second phase is structured insertion. The transition gets placed into a simple drill with one attack pattern and one tactical answer. This teaches recognition. The student is no longer switching tools at random. The transition now belongs to a problem.
The third phase is variable pressure. Range changes, timing shifts, and the partner becomes less cooperative. The options are still limited, but the student must make decisions and maintain control. This is where many people discover that their smooth solo transition falls apart when the opponent moves.
The fourth phase is integrated sparring or scenario work using appropriate safety gear and strict boundaries. At this point, the transition is part of a larger system. It must work alongside footwork, striking, checking, off-balancing, and disengagement.
This layered approach is one of the strongest ways to train weapon transitions safely because it gives students clear standards. They earn speed and complexity. They do not assume it.
Common errors that need correction early
The first common error is reaching before creating space. If the opponent is still in a position to hit, clinch, or trap, the transition may be tactically wrong even if it looks technically clean. Students need to learn that access comes from positional advantage, not wishful thinking.
The second is visual fixation. Many students look down at the draw or hand transfer. That habit breaks awareness and usually slows the movement anyway. A better standard is to keep visual attention on the opponent while building enough repetition that the hands can work with minimal checking.
The third is carrying too much tension. Over-gripping the initial weapon, muscling the draw, and forcing the sequence all reduce control. Efficient transitions are direct, not frantic.
The fourth is ignoring the non-dominant hand. In real application, the live hand helps monitor, shield, check, trap, or create the lane for the transition. Students who treat it as decorative will struggle under pressure.
When realism helps and when it hurts
Realism is a good goal, but it needs timing. Too much realism too early turns training into noise. Students start improvising before they understand the structure. That is not advanced training. That is premature pressure.
At the same time, staying too cooperative for too long creates false confidence. There has to be a point where the partner disrupts the transition, changes the range, or forces a backup answer. Otherwise, the student never learns whether the skill holds up.
The balance is simple. First build reliability, then test adaptability. In a program-led environment like Kali Sikaran International, that balance is easier to maintain because students can follow defined progressions rather than guessing what hard training is supposed to look like.
Safety standards for instructors and training partners
If you are leading a class, set the rules before the drill starts. Students should know the target speed, legal targets, level of contact, start cue, stop cue, and what counts as a reset. Do not assume they know. Verbal clarity prevents avoidable mistakes.
Equipment checks should be routine. Training knives should be obvious and secure. Sticks should match the drill. Protective gear should fit and allow movement. The room should have enough space for each pair to work without crowding. Good safety culture is not dramatic. It is consistent.
Partners also need permission to slow the drill down. A disciplined training floor is one where students can say, "Reset" or "Again, slower" without ego getting involved. That is not weakness. That is professionalism.
For instructors, one more point matters. Do not praise speed when the structure is poor. Students repeat what gets rewarded. If you celebrate flashy transitions that compromise posture, awareness, or control, the room will drift toward performance instead of function.
What good transition training should produce
Done properly, transition work builds more than technical variety. It builds composure. The student learns how to keep solving the problem when the tool changes, the range collapses, or the first plan fails.
That is the real standard. Not whether a drill looks advanced, but whether it produces usable responses under stress. A good transition should help the student maintain initiative, protect vulnerable lines, and continue fighting with intent.
It should also connect back to the wider system. Stick, knife, and empty hand are not separate islands. In strong Filipino Martial Arts training, they reinforce each other. The mechanics, timing, and tactical ideas carry across ranges when they are taught with discipline.
If you want your transition training to serve self-defense instead of just choreography, keep the goal clear. Move with structure. Progress with purpose. Pressure-test at the right time. Skill grows faster when control leads the process.

If your hubud drill feels smooth in class but falls apart the second speed, pressure, or unpredictability show up, the problem usually is not effort. It is training quality. Knowing how to improve hubud drill starts with understanding what the drill is actually supposed to develop - sensitivity, timing, positional awareness, and the ability to flow from contact into functional responses.
Too many students treat hubud like a hand game. They get good at the pattern, but not at the purpose. A clean rhythm matters, but rhythm alone will not make your hubud useful for self-defense. The drill has to build structure, recognition, and pressure-tested reactions. That means training it with intent, not just repetition.
What hubud drill is really for
Hubud is often one of the first sensitivity drills students meet in Filipino Martial Arts because it teaches you to feel pressure, read direction, and respond while maintaining contact. At its best, it bridges cooperative training and live application. It helps develop reflexes at close range, where vision can be crowded and fast decisions matter.
But hubud is not fighting. It is a training method. That distinction matters because it tells you how to judge your progress. If you only measure your ability by how long you can keep the pattern going, you may be improving at compliance rather than improving at combat function.
A stronger standard is this: does your hubud make your entries cleaner, your defensive reactions tighter, and your transitions more efficient under pressure? If the answer is no, the drill needs to be adjusted.
How to improve hubud drill without just going faster
One of the biggest mistakes in hubud training is confusing speed with skill. Faster hands can hide poor positioning for a while, but they do not fix weak mechanics. In fact, speed often exposes them.
Start by cleaning up your structure. Your elbows should not flare wildly, your shoulders should stay relaxed, and your hands should travel efficiently. Every motion in hubud should protect your center while giving you the ability to check, clear, strike, or transition. If your movements are large and loose, you are giving up time and control.
Next, pay attention to your line. Hubud works best when your hands stay connected to functional angles. If you are reaching outside your frame or chasing your partner's hands, you are training yourself to overcommit. Keep your actions compact. The shorter path is usually the stronger path.
Then focus on timing instead of memorization. Good hubud is not robotic. It has cadence, but it also has responsiveness. You should feel when the pressure changes, when a lane opens, and when a partner's energy gives you information. That is where the drill starts becoming useful.
Fix your base before you fix your hands
Many students try to improve hubud by concentrating only on the trapping cycle. The hands matter, but the body behind them matters more. If your stance is unstable, your hubud will always be limited.
Keep your base under you. Stay balanced enough to hit, move, or disengage at any point in the cycle. Your feet should support your position, not lag behind it. If your upper body is doing one thing and your lower body is doing another, your drill will feel disconnected.
Weight distribution also matters. If you are leaning too far forward, you become easy to off-balance and easy to counter. If you are too upright and stiff, you lose drive and responsiveness. A grounded, mobile stance gives your hands purpose. Without it, hubud becomes an arm exercise.
This is one reason serious training systems treat hubud as part of a larger progression, not an isolated trick. The drill improves fastest when tied to footwork, striking, and range awareness.
Build pressure in stages
If you want to know how to improve hubud drill in a way that transfers, add pressure gradually. Do not jump from cooperative rhythm straight into chaos. That usually creates sloppiness, not growth.
Start with clean repetition at a manageable pace. Once the mechanics are consistent, add light forward pressure. Then vary tempo. Then allow limited disruptions, such as a surprise hit, a change in rhythm, or a sudden angle shift. After that, train recovery. Can you regain structure when the pattern breaks? Can you turn the interruption into a counter, entry, or control?
This step-by-step approach matters because hubud should teach adaptation, not panic. If every disruption shuts you down, the drill is still too shallow. If every disruption makes you abandon structure completely, you are moving too fast.
A good partner helps here. One who gives realistic pressure without turning every round into an ego contest will improve your training much faster than one who only wants to win the drill.
Stop chasing the pattern and start seeing the openings
The pattern in hubud is useful because it creates repetition under contact. The risk is that students begin serving the pattern instead of using it. The moment you become more committed to continuing the cycle than reading what is available, your training loses realism.
Use the drill to identify moments for elbows, palms, knees, arm drags, entries, clearances, and disengagements. Depending on your system, you might also fold in weapon awareness or off-hand checks. The exact tactics can vary, but the principle stays the same: hubud should help you recognize opportunities from touch.
This is where intention changes everything. Instead of thinking, block, pass, check, think, where is the strike, where is the control, where is the exit? That mindset shifts hubud from a classroom exercise into a functional development tool.
Train both sides, but not carelessly
A common weak point is one-sided hubud. Students get comfortable on their strong side and avoid exposing the awkward side. That creates a false sense of competence.
Train both sides, but accept that symmetry takes time. Your weaker side may feel slower, less coordinated, and less intuitive. That is normal. The answer is not to force full speed. The answer is to give the weaker side the same technical standards - posture, line, timing, and intent - while keeping the pace honest.
There is also a practical trade-off here. If training time is limited, your strong side may stay sharper because it sees more application work. That is acceptable as long as you do not ignore the weak side completely. Balanced development builds reliability.
Use hubud to connect with other ranges
Hubud improves fastest when it is not trapped inside its own drill format. You should connect it to entries, clinch control, takedown awareness, and weapon transitions if those are part of your curriculum.
For example, after a few cycles, break into a strike. On another round, enter to control the arm. On another, use footwork to change angle and reset. If you train weapons, let the empty-hand sensitivity support your understanding of close-range weapon access and defense. That does not mean forcing every possibility into every round. It means training hubud as a bridge, not a destination.
This is where structured instruction makes a difference. In a system built around progression, hubud has a place. It supports larger goals such as close-range survival, functional response under pressure, and better decision-making at contact range. Kali Sikaran International emphasizes that kind of principle-based development because drills need to produce usable skill, not just familiarity.
Common mistakes that slow progress
The first mistake is tension. If your shoulders, forearms, and hands are tight, your sensitivity drops. You feel less, react slower, and tire sooner. Relaxation does not mean being lazy. It means being ready.
The second mistake is overextension. Reaching for the hand instead of controlling the line opens your center and weakens your position. Stay compact.
The third mistake is passive drilling. If you and your partner are just feeding each other the same clean motion forever, the drill may look good but teach very little. Add purpose.
The fourth mistake is treating hubud like proof of fighting ability. It is not. It is one tool. A valuable one, but still one tool.
A better way to measure improvement
Do not measure progress only by how smooth your rhythm looks. Measure whether your reactions are cleaner under change. Measure whether your posture holds when pressure increases. Measure whether you can interrupt, recover, and transition without freezing.
You should also notice carryover. Are your close-range defenses improving? Are you better at reading pressure through contact? Are your strikes and checks more efficient when space gets crowded? If hubud is trained correctly, those changes show up.
Real improvement is not flashy. It is tighter structure, better timing, less wasted motion, and more composure when the drill stops being comfortable.
Keep your hubud honest. Train the pattern, but do not worship it. Use it to sharpen touch, position, and decision-making. When the drill starts building those qualities, it stops being a routine and starts becoming a real asset in your training.