
A flow drill can feel sharp with a partner and fall apart the moment you train by yourself. That is not a reason to skip solo work. When you practice flow drills alone, you remove the comfort of reacting to a familiar rhythm and expose the quality of your own movement: your posture, weapon line, footwork, recovery, and discipline.
Solo training will not replace a training partner. You cannot fully develop timing, contact sensitivity, range judgment, or pressure without another person. But used correctly, it is where you build the mechanics that make partner training safer, cleaner, and more productive. The goal is not to perform a routine in the air. The goal is to develop positions and transitions you can rely on when the speed increases.
What Solo Flow Training Is Actually For
In Kali Sikaran and Filipino Martial Arts, flow drills teach you to move from one answer to the next without freezing. You may train angles, checks, entries, weapon transitions, destructions, clears, strikes, and exits in a continuous sequence. With a partner, the drill teaches exchange. Alone, it teaches ownership.
That distinction matters. A solo drill should make you more precise, not merely more tired. Every motion needs a tactical reason. Your live hand should check, cover, clear, or protect a line. Your weapon hand should strike through a realistic target. Your feet should carry you to a safer angle rather than leaving you planted in front of an imagined attacker.
If you rush through a pattern because it looks fluid, you can rehearse poor habits thousands of times. If you train the same pattern with clear targets, balanced structure, and deliberate intent, you build useful movement that transfers to the next partner session.
Set a Clear Training Objective
Do not begin with ten different drills. Choose one purpose for the session. A 15-minute session focused on clean forehand-backhand recovery is more valuable than an hour of unfocused movement.
For stick work, your objective may be maintaining a protected chamber after every strike. For knife training, it may be keeping the weapon close to your body and refusing wide, exposed cuts. For empty-hand flow, it may be connecting a parry, counter, and angle change without crossing your feet or losing your guard.
A useful question is: what breaks down when the drill gets faster? That is usually the part worth training slowly. Perhaps your checking hand drops. Perhaps your shoulders rise. Perhaps you overreach on a strike and need an extra beat to recover. Identify the weakness, then build the session around correcting it.
Build the Drill From Positions, Not Speed
Start by walking through the drill at a pace that allows you to stop at any point. If you cannot freeze in balance, with your hands in a defensible position and your weapon controlled, you are moving too fast.
For a simple single-stick solo flow, establish an on-guard position first. Deliver an angle-one forehand strike toward a realistic target line, recover with the hand protected, then deliver an angle-two backhand. Add a roof block, a return strike, and an angle step off the centerline. Finish in a position that allows you to continue, disengage, or access another tool.
The sequence itself is less important than the details. Keep your elbow from flaring unnecessarily. Let the hips support the strike rather than swinging only with the arm. Bring the weapon back under control after impact. Keep the non-weapon hand active and aware of the line it is protecting.
Once the positions are correct, connect them. Think of the drill as a chain of strong frames rather than one long blur. Smoothness comes from eliminating wasted motion, not from moving fast too soon.
Use Imaginary Targets With Discipline
Air training becomes vague when the targets keep changing. Decide where the opponent is standing and maintain that image throughout the round. Identify the head, hand, shoulder, ribs, knee, or weapon arm you are attacking. When you parry or check, visualize the limb you are redirecting.
This also forces honest range. A strike that reaches two feet beyond the imagined target is not a powerful strike. It is an overcommitment. A defensive motion that occurs outside the line may look active but would not protect you. Your imagined opponent should make you accountable for distance and direction.
Add Footwork Before Adding Complexity
Many students can perform a flowing hand pattern while standing still. The problem appears when the body has to move. Real self-defense is not a stationary exchange. Your footwork must support your angle, preserve balance, and give you a route away from danger.
Begin by adding one step to a short sequence. For example, step offline as you defend, deliver your counter, then move again as you recover. Avoid stepping straight backward every time. Retreating can create space, but lateral and diagonal movement often gives you a better angle while taking you off the opponent's strongest line.
Train both sides, even when one side feels awkward. The weaker side reveals gaps in coordination and understanding. It may never feel identical to your dominant side, and that is normal. The standard is not perfect symmetry. The standard is functional movement under control.
For more advanced solo work, combine footwork with range changes. Start at largo range with weapon strikes, close distance into a simulated check or arm control, then exit with a strike or disengagement. This prepares the body for the changing ranges found in sumbrada, hubud, knife defense, and close-quarter empty-hand work.
Use Rounds That Create Measurable Progress
A timer prevents solo practice from becoming random repetition. Work in short rounds with a specific standard. You might spend one round on slow technical reps, one round on continuous movement, and one round on controlled speed.
A practical session can follow this structure:
Spend three minutes reviewing the base positions at slow speed.
Spend three minutes connecting a short flow with consistent targets.
Spend three minutes adding footwork and angle changes.
Spend two minutes working the non-dominant side.
Spend two minutes moving at a higher pace without sacrificing form.
Rest briefly between rounds and assess what changed. Did your guard stay in place? Did your breathing become shallow? Did the sequence remain recognizable, or did it turn into uncontrolled swinging? These are useful training observations, not failures.
Keep a simple record after the session. Write down the drill, the number of rounds, the main error you noticed, and one correction for next time. This fits a progression-based approach to training. Improvement becomes visible when you can measure your work instead of relying on how hard the session felt.
Train With a Mirror, Camera, or Training Target
A mirror can help you catch obvious errors in posture, shoulder tension, and hand position, but do not stare at your reflection while moving. Glance, correct, then return your eyes to the imagined threat area. In a real confrontation, your attention belongs on the person in front of you, not on your own technique.
Recording short video clips is often even more useful. Watch the footage without sound. Can you see the target of each strike? Are your steps stable? Does the weapon recover to a position of control? Video makes rushed transitions and dropped hands difficult to ignore.
A safe training target adds another layer of honesty. A hanging target, striking post, or padded impact surface can teach you whether your angles land with structure. Use appropriate equipment and train within the limits of the target. Do not strike hard objects with a weapon or tool that can rebound, splinter, or damage your hands.
Know What Must Wait for Partner Training
Solo drills are excellent for movement quality, but they have limits. Do not convince yourself that rehearsing a disarm alone means you can take a weapon from a resisting attacker. Do not assume a smooth hubud pattern guarantees sensitivity against force, unpredictability, or different body types.
Partner work adds pressure, contact, timing, and consequence. It teaches you whether your entry actually closes distance, whether your check can control an arm, and whether your movement holds up when someone interrupts the pattern. Solo training prepares you to learn those lessons faster. It does not remove the need to learn them.
The right balance depends on your schedule and training access. If you have only brief solo sessions during the week, use them to sharpen your base. When you meet a coach or training partner, spend that valuable time testing the structure against real movement and receiving correction.
Keep the Fighting Spirit, Keep the Control
The best solo rounds have intent without recklessness. Move with purpose, but do not let intensity turn your drill into careless speed. A clean sequence performed under control builds confidence because you know what your body is doing. A wild sequence may feel aggressive, but it does not build dependable skill.
Finish each session with a few slow repetitions of the movement you want to own. Stand balanced, see the line, execute the defense or strike, recover, and breathe. Those final quality reps give your next training session a stronger starting point.
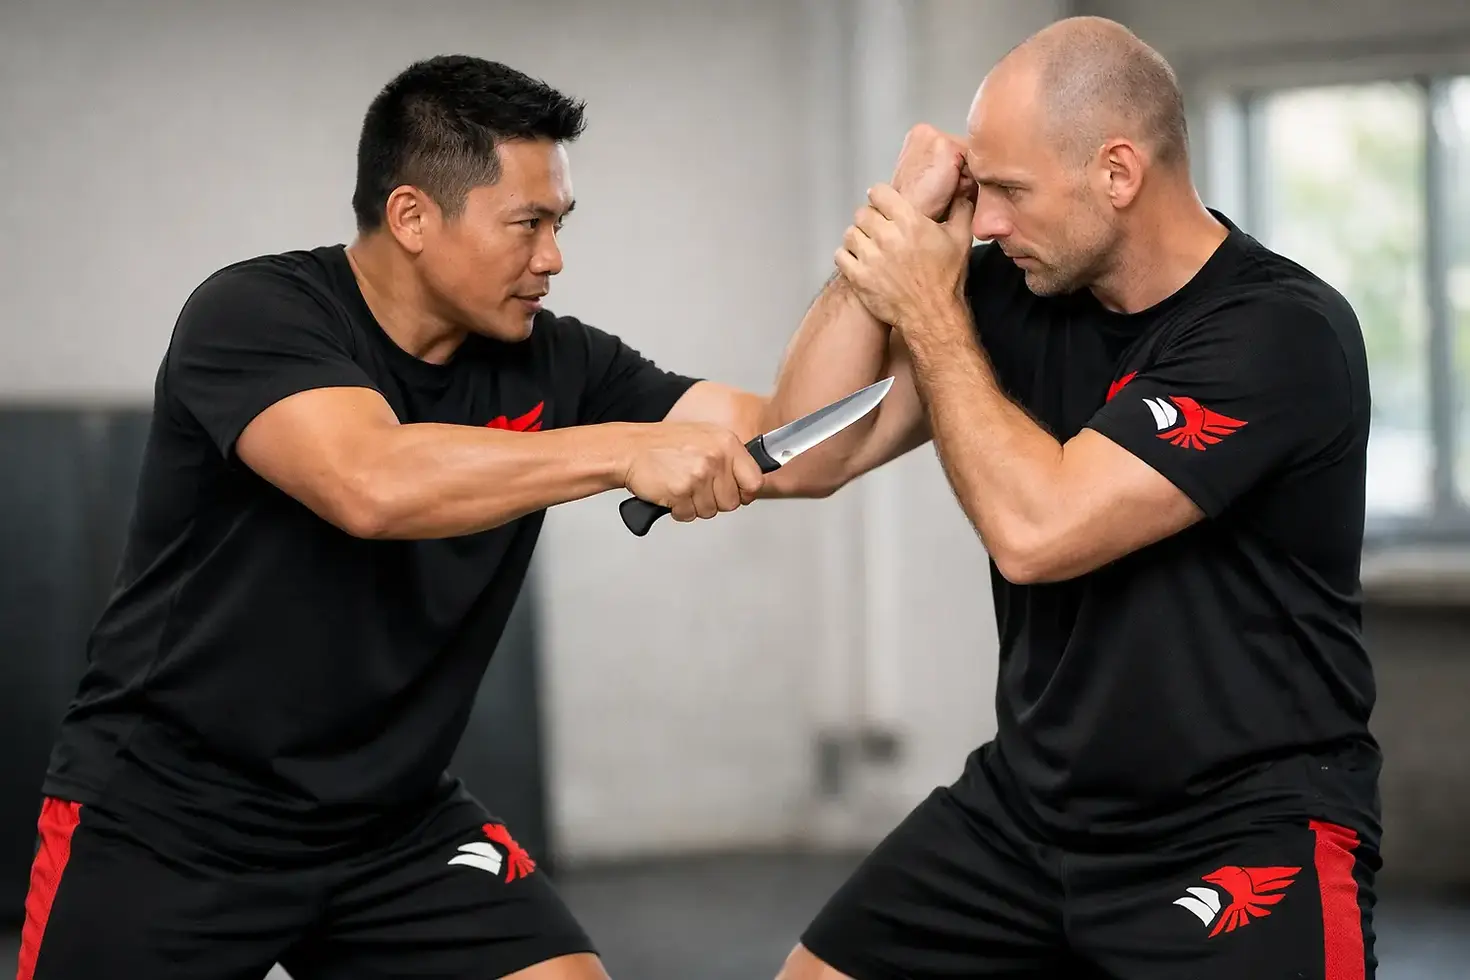
A knife incident is not a test of courage or a chance to prove technique. It is a fast-moving survival problem where awareness, distance, judgment, and escape matter more than a complicated response. Knife awareness drills train those priorities before stress narrows your attention and steals time.
For beginners, this work builds confidence without false confidence. For experienced martial artists, it keeps weapon training connected to the realities of timing, environment, and decision-making. The purpose is not to become fascinated with the weapon. The purpose is to recognize danger early, protect your options, and get home safely.
What Knife Awareness Drills Actually Train
Good knife awareness drills are not limited to seeing a blade. In many real confrontations, the weapon may be concealed, partially obscured, or introduced after an argument has already begun. Training must therefore develop recognition of behavior, position, distance, and environmental risk.
Awareness begins before physical contact. Is someone closing distance aggressively? Are they trying to block your path? Is one hand hidden, occupied, or held close to the body while the other hand distracts you? Is there a verbal confrontation that is escalating rather than resolving? None of these signals proves that a weapon is present. They do tell you to become more careful, create space, and prepare to leave.
The best drills also teach a critical truth: you may not know a knife is involved until late in the encounter. That is why practical training emphasizes general protective habits rather than a response that depends on perfectly identifying a weapon at the start.
The First Skill: Managing Distance and Position
Distance is time. When you have more of it, you have more opportunity to recognize danger, move toward an exit, use obstacles, call for help, or make a clear decision. When distance disappears, your choices become narrower and more stressful.
A simple awareness drill starts with a training partner at conversational range. The partner changes posture, steps forward, angles to either side, or attempts to close the gap while speaking. Your job is not to perform a technique. Your job is to maintain a safe position, keep your hands in a natural protective posture, move toward open space, and use a clear verbal boundary such as, “Stop. Stay back.”
This drill becomes valuable when it is measured. Can you stay aware of the room while addressing the person in front of you? Can you move without crossing your feet or backing yourself into a wall? Can you see an exit? Can you maintain balance while speaking? These are practical standards that apply whether a weapon appears or not.
Use barriers whenever possible. A chair, table, vehicle, doorway, shopping cart, or even the corner of a building can slow access and create time. In training, students should practice moving around common obstacles without becoming trapped by them. The goal is not a perfect pattern. It is learning to see the environment as part of your safety plan.
Train the Exit, Not the Exchange
A common mistake in knife training is focusing too early on trading actions at close range. Reality does not reward unnecessary engagement. If there is a clear route out, take it. If you can create a barrier, create it. If you can de-escalate without surrendering your safety, do it.
Your training should reflect that priority. End awareness drills with a decision: move to an exit, place an obstacle between yourself and the threat, seek help, or disengage. This prevents the habit of remaining in front of a dangerous person simply because the drill has not told you to stop.
Recognition Drills Build Better Decisions
Recognition is not paranoia. It is the ability to notice meaningful changes without freezing or assuming the worst about everyone around you. This is especially important for adults who want practical self-defense skills they can use at work, while traveling, in parking areas, or in everyday public spaces.
One useful drill is a verbal escalation exercise. A partner begins with a neutral request, then gradually increases pressure through tone, proximity, movement, and attempts to control your position. At any point, the partner may reveal a clearly marked training knife or may not. Your task remains consistent: maintain distance, manage your hands and posture, set boundaries, and move toward safety.
The lesson is not to guess correctly every time. The lesson is to respond to escalating behavior before you are forced into a close-range problem.
Another effective format is an environmental scan drill. In a controlled training area, identify exits, narrow spaces, barriers, other people, and objects that could restrict movement. Then walk through a scenario with a partner and explain your choices out loud. Speaking your decisions helps expose gaps in your thinking. You may notice that an apparent exit places you in a corner, or that a barrier is useful only if you reach it before the other person closes distance.
Stress Changes What You See
Under pressure, people often fixate on the most obvious threat. This can cause tunnel vision, loss of balance, poor communication, and failure to notice an escape route. Knife awareness drills should challenge attention without becoming reckless or chaotic.
Start with simple variables. Add a second person in the room. Add a verbal task, such as calling out an exit or describing what is in the attacker’s hands. Add movement around a barrier. Keep the pace controlled and purposeful. The objective is not to overwhelm beginners. It is to build composure one layer at a time.
As skill improves, use surprise responsibly. A training partner may present different levels of intent: neutral, verbally aggressive, physically crowding, or visibly armed with a soft training tool. Students learn that their posture and movement should not collapse when a scenario changes. They should create space, protect themselves, and make the safest available decision.
Do not turn this work into a game of winning. Scoring should reward early recognition, clear verbal boundaries, safe movement, environmental awareness, and successful disengagement. If a student “wins” by staying in a dangerous range to demonstrate a technique, the drill has taught the wrong lesson.
Safety Rules for Knife Training
Weapon awareness training demands discipline. A casual attitude creates bad habits and unnecessary risk. Use purpose-made training knives with no sharp edge or point, inspect equipment before every session, and establish clear rules for intensity and contact.
Students should never train with live blades during partner drills. A live weapon has no place in scenario work, speed work, or close-range practice. Keep the training area clear, remove distractions, and stop immediately if anyone loses control, becomes overly competitive, or cannot follow instructions.
It also helps to separate learning phases. First, practice recognition and movement slowly. Next, add communication and environmental choices. Only then increase pace within the limits of control. Speed without structure usually produces panic, sloppy footwork, and memorized reactions that fail as soon as the scenario changes.
At Kali Sikaran International, this principle-based approach matters because skills must transfer across ranges and circumstances. A student who understands awareness, position, movement, and recovery has a stronger foundation than someone who only remembers a sequence.
Build a Weekly Awareness Practice
You do not need hours of training every day to make progress. Two focused sessions per week can develop meaningful awareness when the work is consistent. One session can emphasize distance, exits, and verbal boundaries. The other can focus on recognition, barriers, and controlled decision-making.
Keep a simple training standard. After each round, ask: Did I see the exit? Did I maintain balance? Did I let the other person control my position? Did I communicate clearly? Did I disengage when an opportunity appeared? These questions turn practice into measurable development.
There is no guaranteed defense against a knife. That honesty should shape how you train. Awareness drills do not promise certainty, but they can improve the choices you make before, during, and after a threat develops. Train with discipline, respect the danger, and make every repetition reinforce the same fighting principle: create time, create space, and protect your way out.

A defensive technique can be correct and still fail because your feet put you in the wrong place. You may see the strike, cover your head, or recognize the weapon line, but if you are planted, crossing your feet, or retreating straight into a wall, your options disappear. Learning how to develop defensive footwork means learning to control distance, create safer angles, and keep your balance when the situation becomes fast and uncertain.
For practical self-defense, footwork is not decorative movement. It is your delivery system for awareness, evasion, striking, controlling, and leaving. In Filipino Martial Arts, the same foundation supports empty-hand defense, stick work, blade awareness, and movement against more than one threat. The goal is not to look light on your feet. The goal is to stay functional under pressure.
Start With a Defensive Base
Good movement begins before you take a step. Build a stance that is stable enough to absorb force but mobile enough to move immediately. Place your feet about shoulder width apart, with one foot slightly forward. Keep your knees soft, your weight balanced, and your posture upright enough to see what is happening around you.
Avoid loading too much weight onto the front leg. If your front knee is heavily committed, it becomes difficult to move back, angle off, or check a low-line attack. Avoid leaning far back as well. Leaning may feel safe against a strike, but it can compromise your balance and make your next movement slow.
Your hands and feet must work together. If your hands are in a protective position but your feet are square and fixed, you are only partially prepared. If your feet move but your hands drop, you have created another opening. Train the whole structure as one unit.
A simple test is this: from your stance, can you move forward, backward, left, or right without first shifting your weight dramatically? If not, reduce the width or length of your stance until you can move with control.
How to Develop Defensive Footwork Through Range
Range is the first defensive decision. Before you block, parry, check, or strike, ask whether you should be in that range at all.
At long range, your job is to maintain awareness and avoid being caught by a sudden entry. At middle range, you need enough mobility to evade, intercept, or create an angle. At close range, footwork becomes tighter. You may need to stabilize your base, prevent being driven backward, control the opponent's position, or move toward an exit.
Many beginners make the same mistake: they move straight backward every time pressure arrives. A retreat can be useful, especially when it opens a path to leave. But repeated straight-line retreat gives the other person a predictable target and can place you against a car, table, wall, or other obstacle.
Train your feet to recognize three basic choices: increase range, change the angle, or close distance to control. Which choice is correct depends on the threat. Against a wide swinging strike, angling away from the power line may be better than retreating. Against an aggressive rush, a short lateral step may prevent you from being run over. Against a weapon threat, distance and escape may be the highest priorities whenever a path is available.
Move Off the Line, Not Just Away
Defensive footwork becomes more effective when you stop treating every attack as a straight backward problem. An attacker generally moves through a line. Your task is often to get your body off that line while keeping your ability to respond.
Practice stepping at 45-degree angles. If an attack comes toward your center, step slightly forward and outside the line only when you can do so safely and maintain awareness. A rearward angle can create space without giving up your balance. The exact direction depends on the attack, the environment, and where the opponent's weapons are positioned.
In Kali Sikaran training, triangular movement is useful because it gives your body more than two choices. Rather than moving only forward and backward, you learn to step to points that change the relationship between you and the threat. This helps create lines for evasion, checking, countering, and disengagement.
Do not turn every angle step into a large leap. Large movements can be slow, obvious, and difficult to use in a confined area. Most practical angles are small, efficient adjustments that move your head and body away from danger while preserving a base for the next action.
Use Steps That Preserve Your Balance
The best step is not always the fastest-looking step. It is the one that leaves you able to move again.
A shuffle step is useful when you need to move a short distance while keeping your stance. The foot in the direction you are moving goes first, followed by the other foot. Move left by taking the left foot first. Move backward by taking the rear foot first. This prevents your feet from tangling and keeps your base available.
A step-and-drag movement works well for maintaining range. A pivot helps you change direction without traveling far. A drop step can help you move quickly backward or create an angle, but it needs careful practice so you do not overextend or lose posture.
Do not make “never cross your feet” an absolute rule. Crossing steps have a place when you need to cover distance, reposition, or navigate an obstacle. The problem is crossing your feet inside immediate fighting range without a reason. That creates a moment where you cannot base, stop, or change direction effectively. Build stable movement first, then add transitional steps with purpose.
Train Footwork With a Clear Purpose
Footwork improves when every drill has a problem to solve. Randomly bouncing around the room may improve conditioning, but it does not automatically build defensive decision-making.
Start with shadow movement. Stand in your defensive base and have an imagined threat in front of you. Move forward, backward, and to both angles while keeping your hands positioned and your eyes level. Do not rush. Pay attention to whether your feet stay under you and whether your stance is ready after every step.
Then add a line drill. Mark a line on the floor and practice stepping off it at an angle as you cover, parry, or frame with your hands. The line represents the path of an incoming attack. Your objective is to avoid staying directly in front of it.
Next, use a partner drill. Have a partner feed controlled, predictable attacks while you focus only on position. Do not rush to counter. First, move safely. Then add a simple response such as a check, palm strike, or controlled strike to a training target. In weapon training, begin with safe equipment and clear limits. Your footwork should take you away from the weapon line, not toward the hand holding it without control.
As your skill develops, add verbal pressure, movement in a smaller space, and unpredictable timing. This is where good footwork becomes honest. You may find that the angle you used easily in open space does not work near furniture or in a narrow hallway. Adapt the step, shorten it, or choose distance and exit instead.
Build Pressure Without Losing Control
Pressure training does not mean training recklessly. It means gradually making the drill more realistic while keeping the objective clear.
Work through a progression: first learn the step, then perform it with a partner, then perform it with variable timing, and finally perform it while managing multiple tasks. You may need to move, protect your head, identify the threat, use your voice, and find an escape route at the same time.
A useful benchmark is recovery. After you evade or angle off, can you immediately move again? Can you maintain awareness of the person's hands? Can you disengage without stumbling? If the answer is no, slow the drill down and rebuild the movement.
Train both sides. You will naturally prefer one lead and one direction, but real situations do not arrange themselves around your strongest side. Develop the ability to step, pivot, and recover in either direction. Your weaker side does not need to feel identical at first. It needs to become dependable.
Common Footwork Errors to Correct
Watch for heels that stay glued to the floor, feet that come too close together, and steps that are so wide they trap your weight. Also watch your eyes. Students often look down at their feet while learning a new pattern. That may be acceptable for a few slow repetitions, but it cannot become the habit. In a defensive situation, your vision must stay on the threat, the environment, and available exits.
Another common error is moving without managing range. Fast feet do not help if every step carries you into striking distance. Make each movement answer a question: Am I safer here? Do I have balance? Can I leave, defend, or control if I must?
Footwork is built one correct repetition at a time. Train it slowly enough to maintain position, then increase speed only when your posture, awareness, and recovery remain intact. The person who can move calmly, stay balanced, and choose the right angle has already created a major defensive advantage.